starting up the GiMP
OK -- I imagine that many of you have installed the GiMP and have tried ti play with it. That's good -- but now you're frustrated because you have no idea what you're doing. The tool is somewhat robust and you're a N00b.
You know: we have all been there.
So wherever you are, let's just launch the GiMP and walk through the basic menus together, and work on a small project just to get the hang of what exactly we can do with this thing.
To make life harder on you, I am writing this first tutorial on my wife's Mac laptop which has a small screen, so as we look at the screen captures what you see may vary by platform (the way the windows render, or how your desktop works), but they will still manage to have the same functions.
Let's look first at the startup state of GiMP, which you can see on my Mac here.
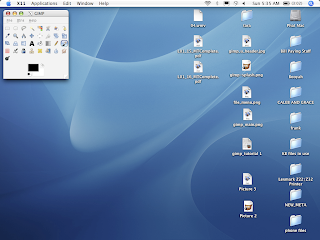
It doesn't look very impressive, does it? I mean: even Paint opens up with a pallet and a workspace, right? GiMP just opens up with this tool pallet dialog and nothing else.
Listen: that's more than enough to start your project. Let's look specifically at the tool pallet and see what it can do for us.

Now, depending on how you have sized your dialog box, it ought to look more or less like the example, above. You can play with the best sizing of the tool pallet dialog by clicking and dragging the bottom-right corner. I have sized my tool pallet dialog so that we can easily see the menu options -- because that's what we need to get started on a new image.
Use your mouse, click on "File" menu, and let's see what happens.

What you get is a classic "File Menu" set of choices, including (as you can see) the opportunity to configure the GiMP's preferences and edit the Keyboard shortcuts. However, that's an intermediate-level piece of customization, and if you customize GiMP, you might find it harder to follow the tutorials posted here.
We'll cover each part of the file menu separately. Today we're simply going to create a new image, so select "New...". As you do that, notice something which will be specifically annoying for Mac users: all keyboard shortcuts are in WIN/PC conventions, so they are actually "CTRL" + "KEY" and not "APPLE" + "KEY". Get used to it.
OK: when you select "New...", you get this dialog box:

To try to keep this beginner tutorial brief, we're not going to talk about new image templates in this post, and we're also not going to fiddle with the "Advanced Options" right now. Instead, we're simply going to open a new image 200 x 200 pixels in size.
Use you mouse and highlight the value in the "Width" box, or type "Alt-w" to highlight it, and type in "200". Then, highlight the value in the "Height" box, or type "Alt-e" to highlight it, and type "200", and click "OK".
You should get something that looks like this:

Now, with that, you're ready to start monkeying around with the tool set on your own, but I want to give you a pointer that will help you understand how the tools work a little better. In the New Image window, select the "Dialog menu"

In the "Dialog Menu", select "Tool Options". You will get a new window on your desktop which will vary depending on which tool you select, but this window is important as it shows you all the options you have for controlling the tools you select as you walk through the GiMP.
You go ahead and play with your 200x200 image for a little while, and next time we'll walk through the basic tools for image manipulation.
You know: we have all been there.
So wherever you are, let's just launch the GiMP and walk through the basic menus together, and work on a small project just to get the hang of what exactly we can do with this thing.
To make life harder on you, I am writing this first tutorial on my wife's Mac laptop which has a small screen, so as we look at the screen captures what you see may vary by platform (the way the windows render, or how your desktop works), but they will still manage to have the same functions.
Let's look first at the startup state of GiMP, which you can see on my Mac here.

It doesn't look very impressive, does it? I mean: even Paint opens up with a pallet and a workspace, right? GiMP just opens up with this tool pallet dialog and nothing else.
Listen: that's more than enough to start your project. Let's look specifically at the tool pallet and see what it can do for us.
Now, depending on how you have sized your dialog box, it ought to look more or less like the example, above. You can play with the best sizing of the tool pallet dialog by clicking and dragging the bottom-right corner. I have sized my tool pallet dialog so that we can easily see the menu options -- because that's what we need to get started on a new image.
Use your mouse, click on "File" menu, and let's see what happens.
What you get is a classic "File Menu" set of choices, including (as you can see) the opportunity to configure the GiMP's preferences and edit the Keyboard shortcuts. However, that's an intermediate-level piece of customization, and if you customize GiMP, you might find it harder to follow the tutorials posted here.
We'll cover each part of the file menu separately. Today we're simply going to create a new image, so select "New...". As you do that, notice something which will be specifically annoying for Mac users: all keyboard shortcuts are in WIN/PC conventions, so they are actually "CTRL" + "KEY" and not "APPLE" + "KEY". Get used to it.
OK: when you select "New...", you get this dialog box:
To try to keep this beginner tutorial brief, we're not going to talk about new image templates in this post, and we're also not going to fiddle with the "Advanced Options" right now. Instead, we're simply going to open a new image 200 x 200 pixels in size.
Use you mouse and highlight the value in the "Width" box, or type "Alt-w" to highlight it, and type in "200". Then, highlight the value in the "Height" box, or type "Alt-e" to highlight it, and type "200", and click "OK".
You should get something that looks like this:
Now, with that, you're ready to start monkeying around with the tool set on your own, but I want to give you a pointer that will help you understand how the tools work a little better. In the New Image window, select the "Dialog menu"
In the "Dialog Menu", select "Tool Options". You will get a new window on your desktop which will vary depending on which tool you select, but this window is important as it shows you all the options you have for controlling the tools you select as you walk through the GiMP.
You go ahead and play with your 200x200 image for a little while, and next time we'll walk through the basic tools for image manipulation.

